Use Link2SD to Expand Internal Memory of Android
So, you are installing a new app on your Android. But the moment you hit the install button, there is — ‘insufficient memory’ error. Now, you can always go back and make some room, by uninstalling lesser used apps. But there is a better alternative.
You can convert some of the free space on the SD card to internal memory. And later use that space, to install applications.
From Android KitKat onwards, you can not install apps on your SD card. You can only use to save pictures, videos and app data. However, with root access and apps like link2SD, you can change that. The process is not quite obvious, but once you set it up, everything works like a charm.
What do I need?
Before we start, make sure you have–
A rooted Android with SD card slot
An SD card (obviously)
Internet access to install Apps (like link2sd and AParted)
How will we do it
Now, we are going to do this in 4 steps–
Step 1: Root your device
Step 2: Take backup of your SD card’s data
Step 3: Create a partition on your SD card
step 4: Install and configure Link2SD
So let’s get started;
#1 Root your Android
Linking apps to SD card requires root level permission. So, make sure you root your device, if not already done.
Now, how do I do that? Well, unfortunately, there is no one way to root every android. Every device is different and so is there rooting process.
The best way to find out, how to root your android, is by doing a simple Google with your device name. Also, check if your device is compatible with Kingo root— a popular one-click root app.
Once you have a rooted smartphone, follow to next step.
#2 Take backup up data
Before you install apps on your SD card, you will have to first format it. And this ‘formatting your memory card‘ will erase everything you have on it. So yes, make sure you have created a copy of its content.
You can take the backup, by connection your phone to computer via USB cable and then copy the files to your hard drive. Or, if you have a Wifi network, then use Airdroid,. It’s quick and do not require any cables.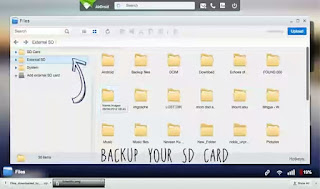

Once you have taken the backup, move to next step.
#3 Partition your SD card:
Every OS has their own preference for the file system.
Most memory cards are in the FAT32 format, which is good when you want to use it with Windows and MAC. But since we also want to use this SD card as an internal storage, we will have to format a part of it to ext2 — a popular file system for Linux.

So in a nutshell, we will create two partitions on the SD card:
One-half will be in ext2 format, which will be used as our internal memory
The other half will be in fat32 format so that we can use it as regular SD card for storing photos and videos etc.
For the simplicity of this tutorial, I will take a 2 GB card and format 1 GB to FAT32 and the other half to ext2.
So Follow the steps
1. Before you make any changes to your SD card, first go to settings and unmount it.

2. Next, install AParted and open it. It will ask for root permission, grant that.

Why AParted?
Well, there are few tutorials on the web, that suggest using a desktop tool (like mini partition tool ) to partition your SD card. But, that just a tedious process — removing the card from your phone, inserting it on the computer and then repeating the same process again. It’s a waste of time.
Instead, if you use AParted, you can get the same result in less time and minimum effort. The app works fine. However, if you face any problem, you can alway use the mini partition tool.
3. Now, to create a partition, tap on part 1, under format select fat32 and for size specify the storage, you want to give to your memory card.
I will allocate half i.e. 1 GB, but you can choose what you want.

4. Next, tap on the ‘green plus sign’ and part 2 window will appear. Under format select ext2 (you can also select ext3 or ext4, but if you don’t know what they are, stick with ext2 only). And again, allocate the remaining space to part 2.
Once done, tap on apply changes and then confirm it. Within seconds, it will format your SD card in two different partitions.

To confirm that the partition was successful or not, go to your storage settings. You will see the size of your SD card reduced to half. You won’t be able to see the ext2 partition, though.
#4 Install and configure link2sd
Finally, it’s time to move all the bulky apps to SD card.
For this, we will use a free app called link2sd. Now, there are other alternatives to this app (like apps2sd) but it doesn’t move every file to SD.
Also, there is also a pro version of link2SD in the play store. And the only difference between the free and paid one is, that the later one, is ads free and can also move app data to SD card.
Now, in most situation, this app data is not going to be a big deal. Usually, it’s around 10% of the total storage you are moving. However, if you want that, then go ahead and get the paid version. It’s also a good way to support the developer.
For this instance, I will go with the free version of link2SD card.
1. Start by install link2SD from Play Store. Then open it and give it a root access.

2. Select the file system for your internet memory. If you remember, we have set ext2 format for that, so select that and restart the device.

3. Now, once you have restarted your Android, open the link2SD app again. You will see all apps you have installed on your device.
To move apps on your SD card, you can filter apps, that are on your internet memory and then sought them according to size.

4. Now to move them, tap on the 3 vertical dots on the top right and select multiple select and select the apps you want to move.


I would avoid moving system apps to SD card, because if you accidentally uninstall them, or remove your card, other dependent apps may misbehave. So, avoid system apps if you can.
5. Once you are done selecting apps, Again tap on three vertical dots and from the menu select > move to sd card > make sure every file type is check marked > OK. And that’s it, all the apps you selected will be moved to SD card.

6. To make sure all, the future apps, automatically install on SD card > go to settings > check mark auto link.

To uninstall apps, you can unlike the apps from the sd card, and then uninstall them. Also from now on, think twice before removing your sd card, as you are now also storing your apps in it.
Overall, link2sd is one of those apps that you have set it up once and forget about it.
Comments
Post a Comment